

Guide
Scan a menu, order better
Eating out? Snap the restaurant’s menu and SeeFood ranks its dishes for your diet, your allergies and your week, then logs what you order.
4 min read 5item150 XP
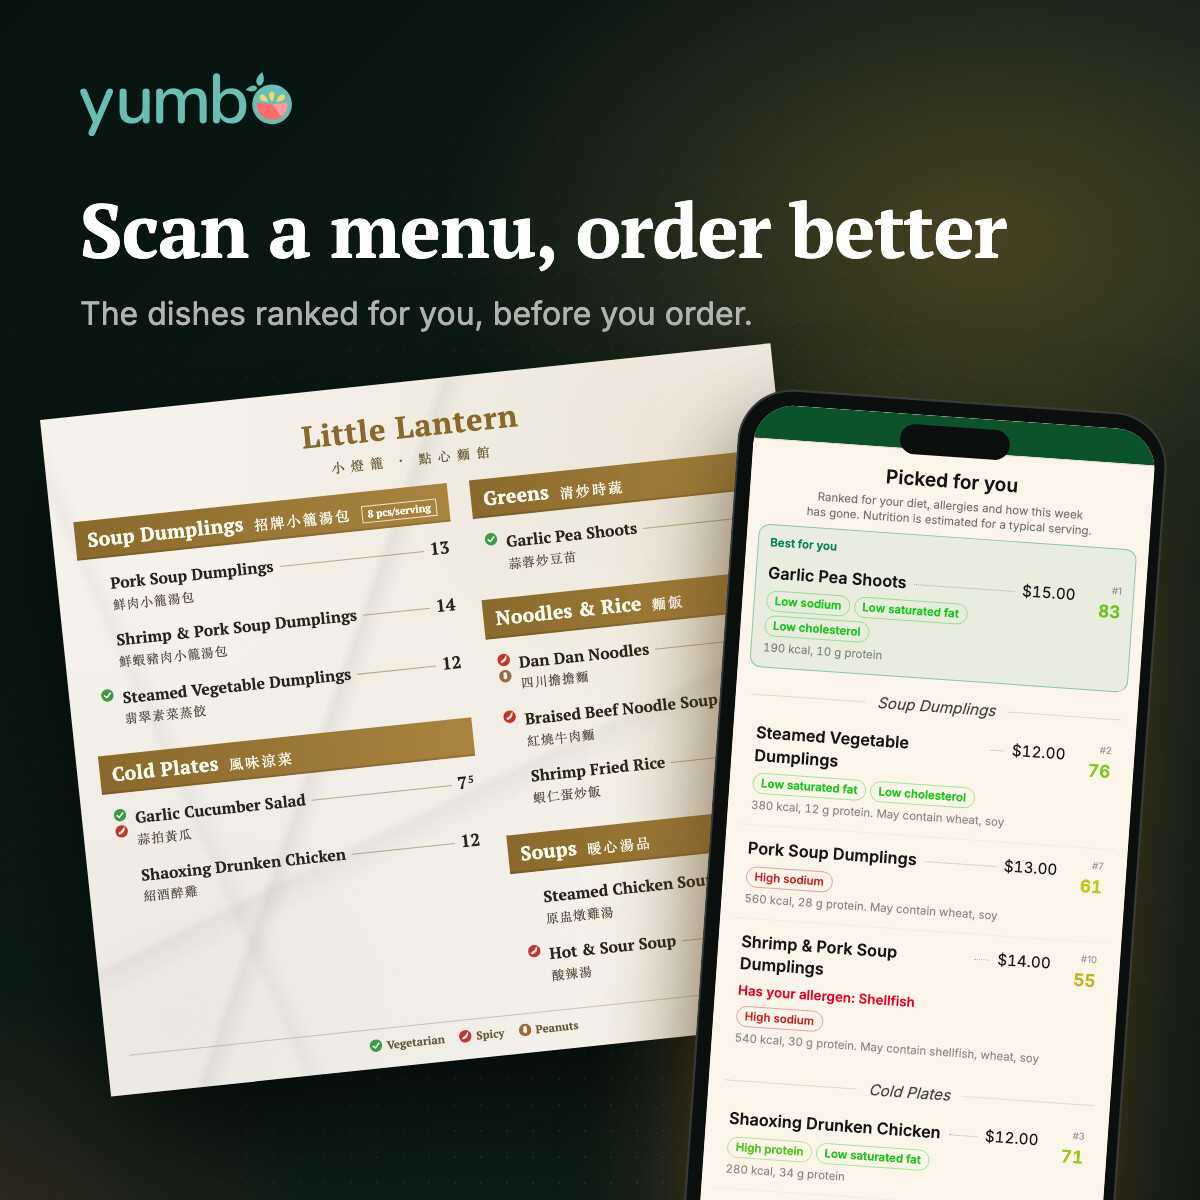
Restaurants are where good weeks go sideways. You sit down hungry, the menu has forty dishes, and none of them list their calories. You order the thing that sounds good, and work out the damage later.
Now you can work it out before you order. SeeFood reads a photo of the menu and ranks every dish for you: your diet, your allergies, and how your week has gone so far. When the food comes, you log what you ordered in a tap.
1. Snap the menu
There's no special mode. Open SeeFood and take a photo of the menu the same way you'd take one of your plate. SeeFood sees that it's a menu and does the rest.
Straight on
Hold the phone flat over the page, not at an angle.
Sharp names
Close enough that you could read every dish yourself.
One page at a time
A two-page menu? Snap the side you’re ordering from.
Good light
Dim restaurant? Tilt the menu toward a lamp or a window.
2. SeeFood reads it
It reads the dishes off the page and counts them as it goes, then ranks them. A menu takes a little longer than a plate, and a long one longer still. When it's done, your picks open on their own. Closed them? Tap See your picks on the meal to bring them back, until you've logged what you ordered.
3. Pick from your picks
Your picks look like the menu you're holding, with each dish ranked for you:
- Best for you sits at the top, set apart from the rest.
- Each dish shows why it ranks where it does, like "Low sodium" or "High protein". Green is good for you, red is why a dish ranks lower.
- The number beside it is your day's score if you eat it.
- A dish with one of your allergies is flagged and is never the best pick.
The rest stay under the menu's own sections, so you can find the dish you were already eyeing and see how it stacks up. A very long menu shows only your top picks, plus a list of the dishes to avoid.
Your allergies and diets come from your settings, so set them first.
4. Log what you ordered
There are two ways to log it, and you pick one.
- Tick it on the menu right after you order. Quick, and it doesn't use another photo.
- Snap your plate when the food comes. It takes one more photo, but SeeFood sees your actual portion.
Tick it on the menu
Tick the dishes you ordered, one or several. Before you log anything, you see what they add up to: calories, protein, carbs, fat and sodium, and the bill. Then tap Log and they go on your calendar as one meal. Sharing the table? Tick only what you ate.
Or snap your plate
Rather wait for the food? Tick what you ordered, then tap Or log these as estimates under the menu. They go on your calendar right away with the menu's estimates, so your day adds up in the meantime. Ordered something else after all? Tap Change your picks on the meal. (Haven't decided? Tap Or snap your plate when it comes instead.) When your order lands, open the meal, tap Snap plate and take a photo. Once SeeFood has read it, your plate replaces the estimates, at the same meal time.
Already logged from the menu? Snap plate is there too, if you'd like the exact portion after all. The photo counts toward your daily photos, and the meal earns its loot only once, whichever way you log it.
How close are the numbers?
A menu doesn't show the plate, so every dish is estimated as a typical restaurant serving of it. Your kitchen might be generous with the oil. Use the ranking to compare dishes on the same menu, where it's most useful, rather than as an exact count. For how photo estimates hold up against restaurant labels, see How accurate is it?
Daily photos
A menu is a SeeFood photo like any other, so it counts toward your daily photos: 2 a day free, or 10 a day with Premium. Premium starts with a 7-day free trial.
Quest
5item150 XPAnswer all 3 questions to earn the reward.